Latest
Vike SSR Rendering
Nov 11, 2023
Re-Engineering the OM617 Glow Plug Relay
Nov 04, 2023
Using the Raspberry Pi and Wolfson Audio Card as a Remote Softrock Interface
January 6, 2022
Topics: SDR Softrock Wolfson Quisk pulseaudio
Note: this was originally on km4dsj.wordpress.com (my old callsign). I moved it here so It's availiable without all the ads. It is painfully out of date, but is here for posterity.
Errata: Quisk-3.7.8 has some errors associated with my hardware_net.py script. Quisk-3.7.7 is working.
Update: I gave a quick presentation on this setup at my local ham club meeting. Here is a link to the ppt slides.
I’ve only been a ham now for about 1 year, but since SDR and low power digital modes are what got me interested in this hobby, building an SDR HF setup was my first foray into the world of 2 way HF communication. Once I had the softrock RXTX Ensemble built, I wanted a way to interface with it such that I could use it with my laptop from anywhere in the house. I also wanted a small setup that didn’t take up lots of room and could hide out of sight. I had been testing the program Quisk and had good results with it connected directly to the softrock, so I opted to continue using it for this step of the project.
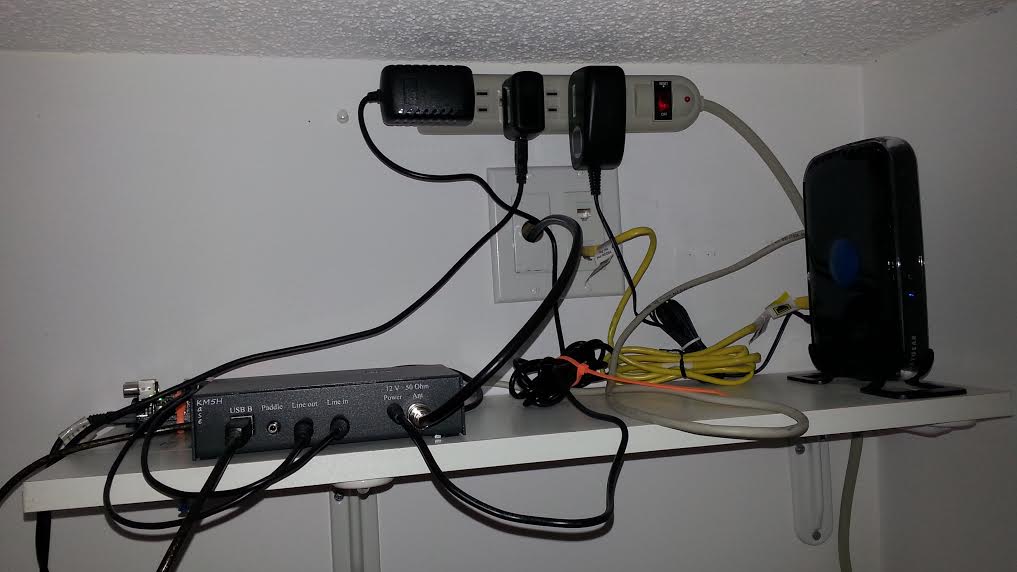
My "shack"
The basic RX path is: Antenna –(RF) -> Softrock RXTX –(I/Q audio)-> wolfson/pi -> pulseaudio -> Quisk –(baseband audio)-> pulseaudio -> speakers/fldigi The first step was to use a quality soundcard. I tested the softrock using a Burr Brown PCM2902 based USB interface, but wanted something that would do 96khz sampling rate. The Wolfson Pi seemed to be the best choice on the market, except for the fact that the drivers were not completely integrated into the raspberry pi kernel. This requires a little extra pain in the beginning for the card to be recognized. The steps below are assuming some basic familiarity with the pi and linux in general. I am currently using this setup to make contacts via PSK, RTTY, JT-65/JT-9. It’s also great for picking up shortwave broadcasts from around the globe. Steps below:
Note: If you already have a working sound card setup, you can skip to the pulseaudio configuration part, step 5.
1) Download the latest Raspian image from the raspberry pi website. Write the image to the SD card.
2) After booting Raspbian, log in using the user pi and default password. I do this using ssh, but you can plug in a keyboard and monitor if you aren’t familiar with that method. Run “sudo apt-get update” and then “sudo apt-get upgrade”. These two commands will ensure you have the most up-to-date distribution before we do any Kernel work. Go ahead and reboot the pi after this.
3) Install git on your local machine. Download the kernel source from Cirru’s github page and follow the directions linked below for cross compiling. On a 64 bit linux machine you’ll need to “sudo apt-get install lib32z1” or else the compile will fail early. Note: There is a pull request on the official raspberry pi/linux github, but I’ve had issues with the card not being detected with that version of the kernel. https://github.com/CirrusLogic/rpi-linux/wiki/Building-the-code
4) After installing the new kernel and modules, reboot the pi. Login and type “aplay -l”. Hopefully the following text appears. If not, something went wrong. Go back and check that the proper modules are being loaded and blacklisted.
**** List of PLAYBACK Hardware Devices **** card 0: sndrpiwsp [snd_rpi_wsp], device 0: WM5102 AiFi wm5102-aif1-0 [] Subdevices: 1/1 Subdevice #0: subdevice #0
5) Next you’ll have to install pulseaudio on the rpi. I’ve opted to build it from source (version 5.0), but version 3.0 is already available through apt-get. Note: I haven’t tested version 3.0 extensively. It may work great, it may work poorly.
6) Edit the pulseaudio configuration files on the raspberry pi. /etc/pulse/default.pa add “tsched=0” to the udev line so that it reads:
|
1
|
load-module module-udev-detect tsched=0 |
A bit of education on Pulseaudio that took me a while to figure out. There are several methods to pipe audio over a network. This was not immediately clear to me at first, and a even the pulseaudio FAQ is a little vague on the different methods. They boil down to this:
- Direct: Setting the client program to connect to a remote server either through through the API or setting “PULSE_SERVER=” when starting the program. This was the route I originally attempted to go . It uses TCP packets and seems fairly robust to network congestion or latency. However, there was a showstopper bug where after some network lag the audio stream would become distorted or the channels out-of-phase. I was able to work around this issue by rewriting the Quisk pulseaudio driver in the asynchronous API. This is the method I am currently using.
- RTP: This sends out the data via UDP packets. There is no acknowledgement of packet receipt on the client side, so data will be dropped if the network lags. This mode seemed “glitchy” when I tested it and resulted in lots of audio artifacts, clicks, pops, etc. It was pretty much unusable.
- Native Tunnel: This is where an interface on a remote machine appears on the local machine the same as any other pulseaudio source or sink. This is handy because it is transparent to the client program, but in my testing there seemed to be a fair amount of network overhead associated with it. I was finally able to get it working by forcing a maximum buffer size when opening the connections. Otherwise, lag would accumulate to absurd levels to where any action was followed by a 5+ second delay.
Also, you’ll need to add the following line to default.pa as well. Substitute your own network subnet if different from 192.168.0.0./24.
|
1
|
load-module module-native-protocol-tcp auth-ip-acl=127.0.0.1;192.168.0.0/24 auth-anonymous=1 |
Modify /etc/pulse/default.conf on the rpi for the wolfson card. This is what I’m using. The default-fragmets and default-fragment-size-msec were determined experimentally. These values seem to work well without taxing the rpi CPU too much. Other values were left default.
|
1
2
3
4
5
6
7
8
9
10
|
allow-exit=nohigh-priority = yesnice-level = -11realtime-scheduling = yesrealtime-priority = 5exit-idle-time = -1default-sample-rate = 96000alternate-sample-rate = 48000default-fragments = 4default-fragment-size-msec = 80 |
Finally, to add real-time priority for pulseaudio on the pi, modify /etc/security/limits.conf. Add the following lines and ensure whatever user you want to run pulseaudio as is in the audio group.
|
1
2
|
@audio - nice -11@audio - rtprio 9 |
After all these changes, you’ll need to restart pulseaudio on the rpi (and your local machine if you used paprefs to enable native sharing.
7) Compile and install usbsoftrock. Download the source from the link below. Untar it, do a ./configure, make, make install. You’ll need to apt-get libusb-dev and libncurses5-dev or the configure step will fail. https://code.google.com/p/usbsoftrock/downloads/list After it’s installed, you can run it in interactive mode or with “-d” for it to listen on the network. I run it as sudo with the -d switch so that quisk can talk to it remotely via UDP. Put an “&” after the command to send it to the background.
8) Modify wolfson volume settings. I created the following script based on the “use scripts” that wolfson provides with the kernel source code. Name it something like SDR-volume.sh in your home directory.
|
1
2
3
4
5
6
7
8
9
10
11
12
13
14
15
16
17
18
19
20
|
#!/bin/bashamixer -Dhw:0 cset name='IN3L Volume' 8amixer -Dhw:0 cset name='IN3R Volume' 8amixer -Dhw:0 cset name='IN3 High Performance Switch' onamixer -Dhw:0 cset name='IN3L Digital Volume' 128amixer -Dhw:0 cset name='IN3R Digital Volume' 128amixer -Dhw:0 cset name='AIF1TX1 Input 1' IN3Lamixer -Dhw:0 cset name='AIF1TX1 Input 1 Volume' 32amixer -Dhw:0 cset name='AIF1TX2 Input 1' IN3Ramixer -Dhw:0 cset name='AIF1TX2 Input 1 Volume' 32amixer -Dhw:0 cset name='HPOUT2 Digital Switch' onamixer -Dhw:0 cset name='HPOUT2L Input 1' AIF1RX1amixer -Dhw:0 cset name='HPOUT2L Input 1 Volume' 32amixer -Dhw:0 cset name='HPOUT2R Input 1' AIF1RX2amixer -Dhw:0 cset name='HPOUT2R Input 1 Volume' 32 |
At this point, the pi should be configured. I need to go back and make a few scripts to automate things, but right now I manually start pulseaudio, usbsoftrock and run the SDR-volume.sh script anytime I reboot.
9) We need to download Quisk on our local machine. If you are running a 64 bit machine, you’ll need to compile it. Once you download and unzip (or git) the source, simply type “make” in the directory and then things will start compiling. See the link below to help identify the necessary libraries. http://james.ahlstrom.name/quisk/docs.html#Installation
10) Finally, you will need to create a ~.quisk_conf.py file. This overrides the defaults in the Quisk directory. Change the name of the sound devices to match your setup. When in doubt, use “pacmd list-sinks” or “pacmd list-sources” to find your hardware. You’ll need to change the ip address for IQ_Server_IP to match that of the raspberry pi.
|
1
2
3
4
5
6
7
8
9
10
11
12
13
14
15
16
17
18
19
20
21
22
23
24
25
26
27
|
name_of_sound_capt="pulse:alsa_input.platform-snd-rpi-wsp.0.analog-stereo"name_of_sound_play="pulse:Channel_1__Channel_2.2"channel_i=1channel_q=0sample_rate=96000 #I/Q inplayback_rate=48000 #audio outname_of_mic_play="pulse:alsa_output.platform-snd-rpi-wsp.0.analog-stereo"mic_playback_rate = 96000 #I/Q outmic_play_chan_I = 1mic_play_chan_Q = 0mic_out_volume=0.8digital_input_name = "pulse:digital-in.monitor"from softrock import hardware_net as quisk_hardwarefrom softrock import widgets_tx as quisk_widgetsusbsr_ip_address = "192.168.0.6"usbsr_port = 19004latency_millisecs = 300 #was 150data_poll_usec = 5000 #was 5000hamlib_port = 4532show_pulse_audio_devices = FalseIQ_Server_IP = "192.168.0.6" |